Blinkenlights - aka ledstrip85 |

|
Blinkenlights - aka ledstrip85 |
|
It's compulsory for every "maker" to have a flashing lights project. This is (or rather, these are) mine.
The original idea was to control a simple strip of RGB LEDs (not the pixel-addressable type) using an infrared remote control handset.
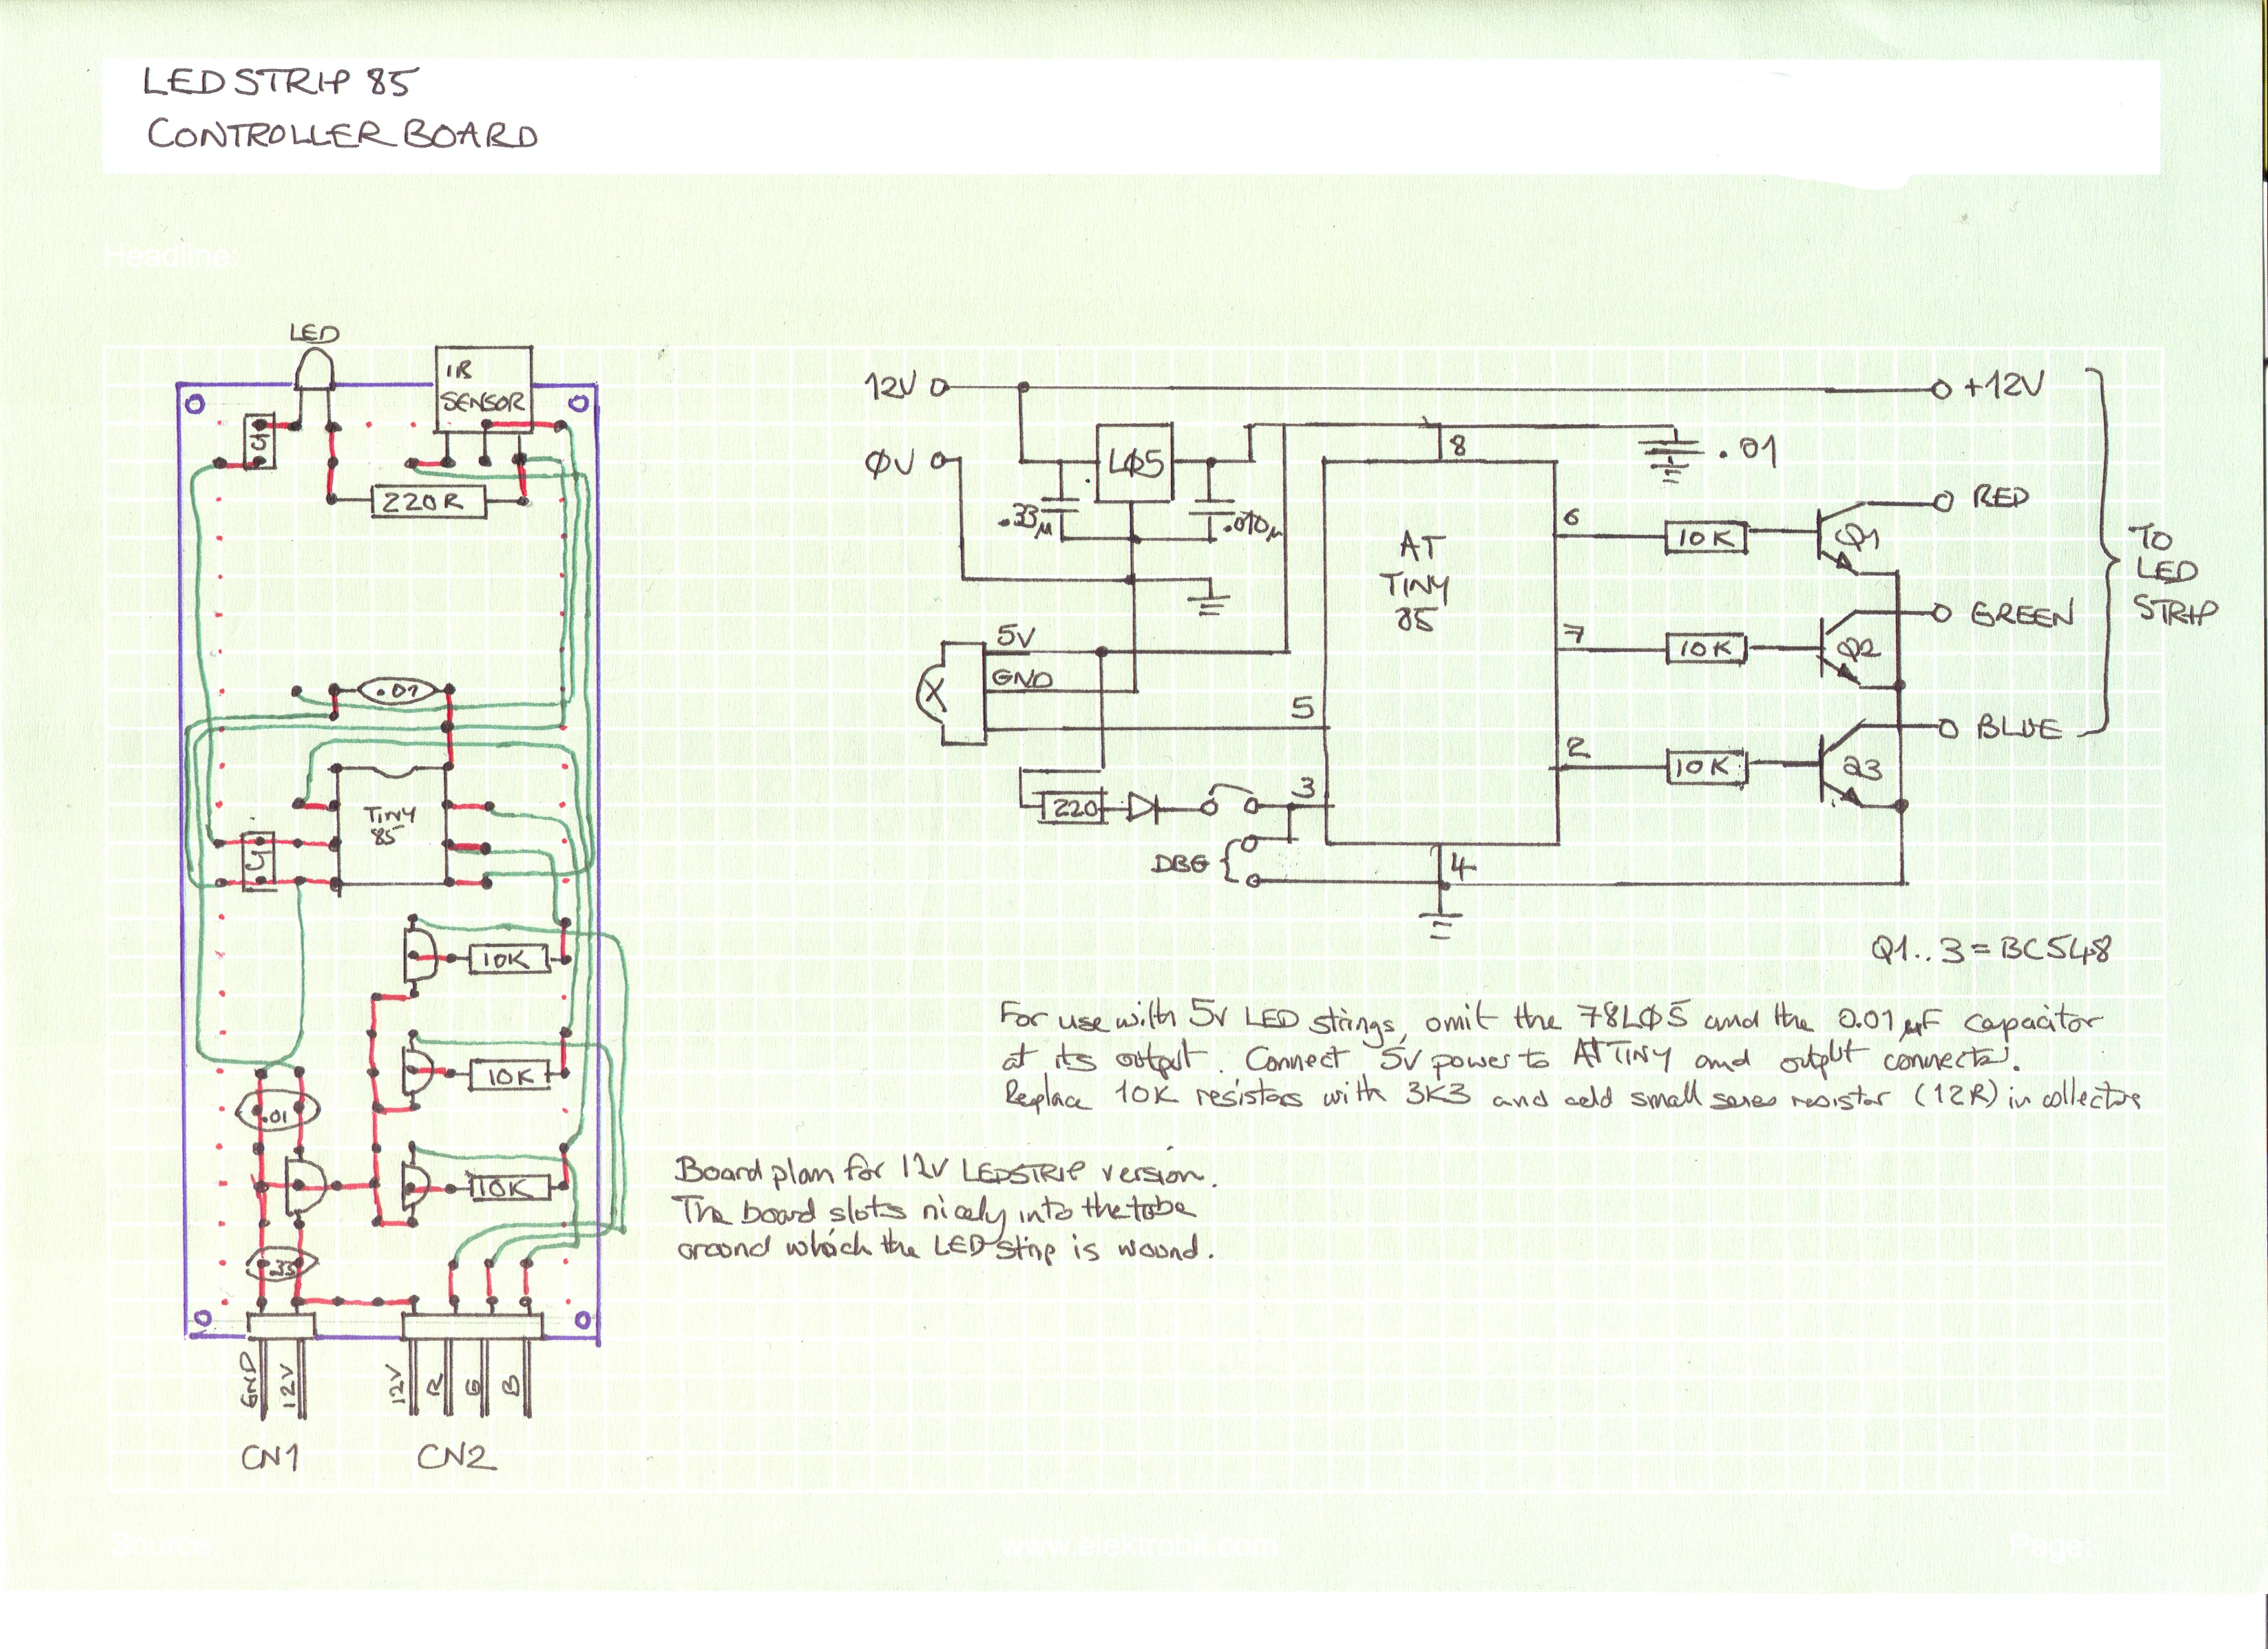
I've got my LED strip wrapped in a spiral form around a cardboard tube. The electronic controller is built on a small matrix board that slots into the top of the tube, with the IR receiver and a tell-tale LED poking out of the top.
The LED strip is powered by a common 12v supply, and the LEDs are illuminated by grounding one of the other three connections (red, green or blue) using a transistor.
Brightness of the LEDs is controlled by PWM.
The original design used an Arduino nano, but I decided that it was overkill, so modified the design to work with an AtTiny85 microcontroller. The IR receiver feeds into pin 5. The R,G and B outputs (pins 6, 7 and 2) drive the bases of three transistors that switch the LEDs on and off. Pin 3 of the AtTiny is used as a serial output for debugging,, but is also connected to a tell-tale LED to indicate that an IR command has been received.
I used an IR remote handset from an old VCR as a controller. If you build the project, you'll have to find a suitable handset and implement a decoder for it. The two handsets that I've tried so far transmit very similar waveforms, so you might be lucky.
I use the power/standby button of the handset to turn off all the LEDs. The numeric buttons 0..9 select one of the operational modes:
In the modes with changing colours, the speed of changing can be controlled.
Click image for a larger version.
You can find the source code in one of the following places, depending on your preference:
You will also need the tiny-bare-metal libraries:
I said I had two projects; this is the 2nd.
This variant is inspired by a cheap gimmick toy that I acquired: a cork-shaped plastic thing containing a couple of lithium cells attached to a chain of LEDs (warm white in this case) on insulated silver wire. The idea is that you stuff the LEDs and wire into a bottle and stick the cork-shaped thing into the top. Pretty boring - constant (and fairly dim) illumination.
I also acquired some cheap LED chains - again, on silver wire, each with two CR2016 cells in a battery holder. The variant project uses three of these LED chains in a bottle to provide variable mood lighting.
Cut off and keep the battery holders - the cells and the holder might come in useful later. The circuit is similar to the LED strip project, but with the following modifications:
For my project, I cut a large hole in the bottom of a glass bottle and arranged the LED chains in the bottle. The circuit board sits in the hole in the bottom so that the IR receiver is visible through the glass. You'll need to make a suitable base for the whole thing. The IR signal works without problems through the glass bottle.
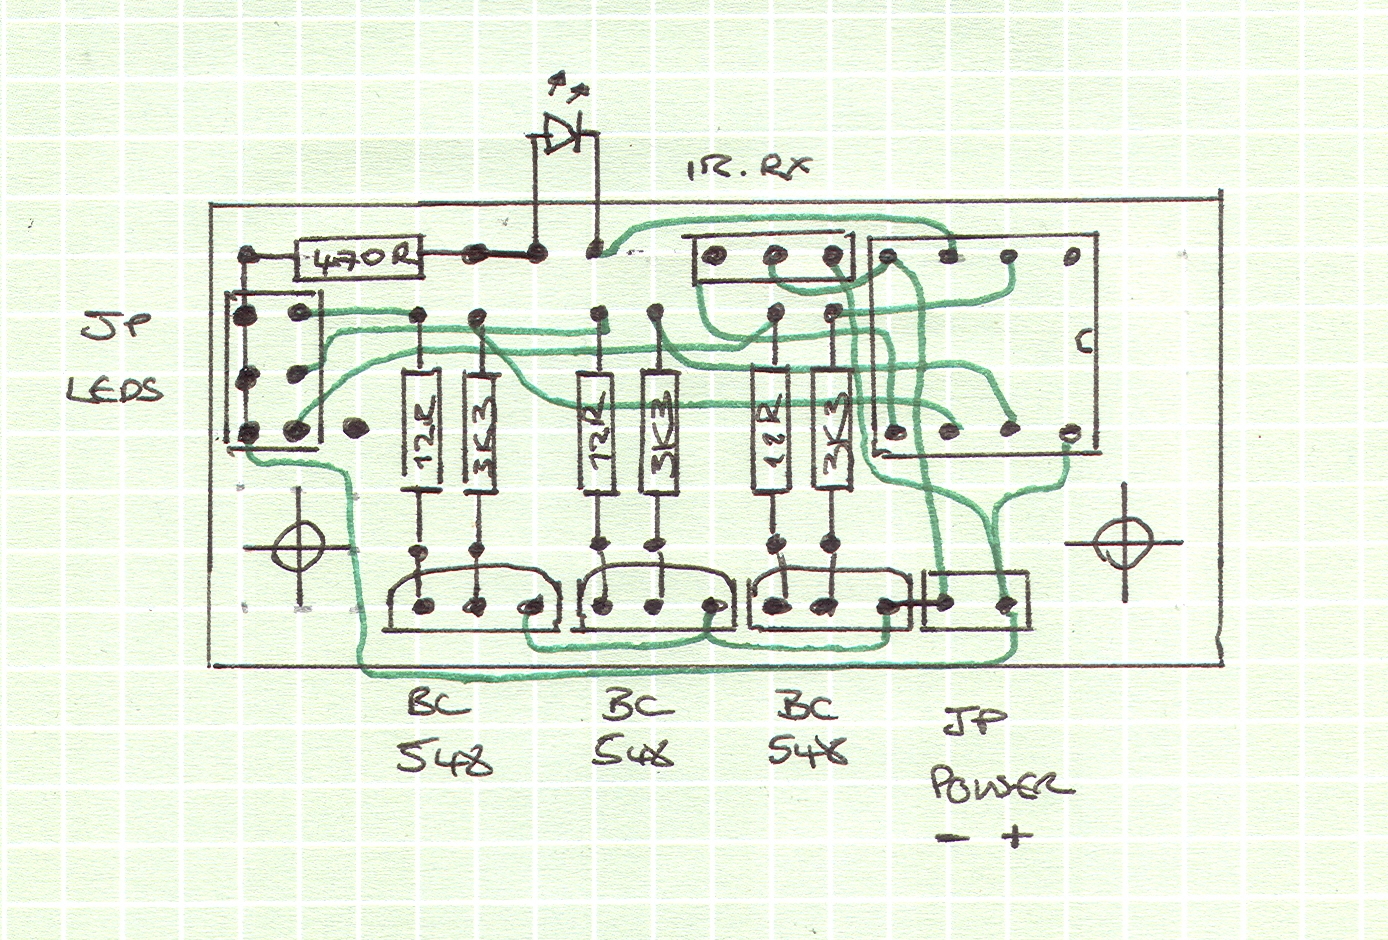
Here's the matrix board layout. I used half of a small board with ready-drilled holes. Before construction, I coloured both sides of the board with a black marker to that the finished board isn't so obvious in the bottle.
The green wires are on the solder side. The black lines are direct (uninsulated) wires, sometimes formed by bending the component leads.
Click image for a larger version.
|
© David Haworth About this site (Impressum). |

|


|